Changing the name of your MacBook can be useful for personalizing your computer or making it easier to identify on a network. The process is very simple and can be done in just a few minutes. In this article, we will show you How to Change MacBook Name With Easy Steps.
Important Considerations Before Renaming Your Mac
Before embarking on the process of changing your Mac computer’s name, take note of the following crucial points:
- Administrative Access: Ensure that you possess administrative access to initiate the computer name change, and verify that you have the necessary permissions.
- Apple ID and iCloud Impact: If your Mac is currently signed in with an Apple ID and utilizes iCloud services, be aware that altering the computer name may have implications for these services. To ensure a smooth integration, it is advisable to sign out of your Apple ID, change the name, and then sign back in.
- System Restart: Changing the computer name typically necessitates a system restart to implement the modifications fully. Plan a convenient time for this restart to minimize disruptions to your workflow.
By considering these factors, you can proceed to change your Mac’s computer name with confidence, minimizing the potential for complications or interruptions to your daily tasks.
Also Read – How To Change Your IPhone’s Name
Why Consider Renaming Your MacBook?
There are various compelling reasons to change the name of your MacBook:
- AirDrop and FindMy: By default, your Mac is identified by its model—MacBook Pro, MacBook Air, iMac, etc. If you own multiple Macs of the same type, they share the same default name. This can pose challenges in distinguishing them, especially in applications like AirDrop or the Find My app.
- Local Network: Having multiple Macs with identical names on a local network can lead to automatic changes in one of their names. This automatic alteration might result in a name that you find less preferable.
- Previous Owner’s Name: If you’ve acquired a Mac from someone else, it may carry a name that includes the previous owner’s information. Changing it to your name becomes a natural preference in such cases.
- Bluetooth Connections: Providing your MacBook with a more descriptive name not only aids in identification during AirDrop but also enhances clarity when establishing Bluetooth connections.
In light of these considerations, renaming your MacBook can streamline device identification and foster a more personalized and efficient user experience.
How to Change MacBook Name Using Settings
The process of changing your Mac varies slightly based on the version of macOS you’re running. With the introduction of macOS Ventura, certain settings that were previously located in System Preferences have been relocated to different sections within System Settings. Consequently, we will guide you through both versions, commencing with macOS Ventura.
On macOS Ventura and Above
Steps:
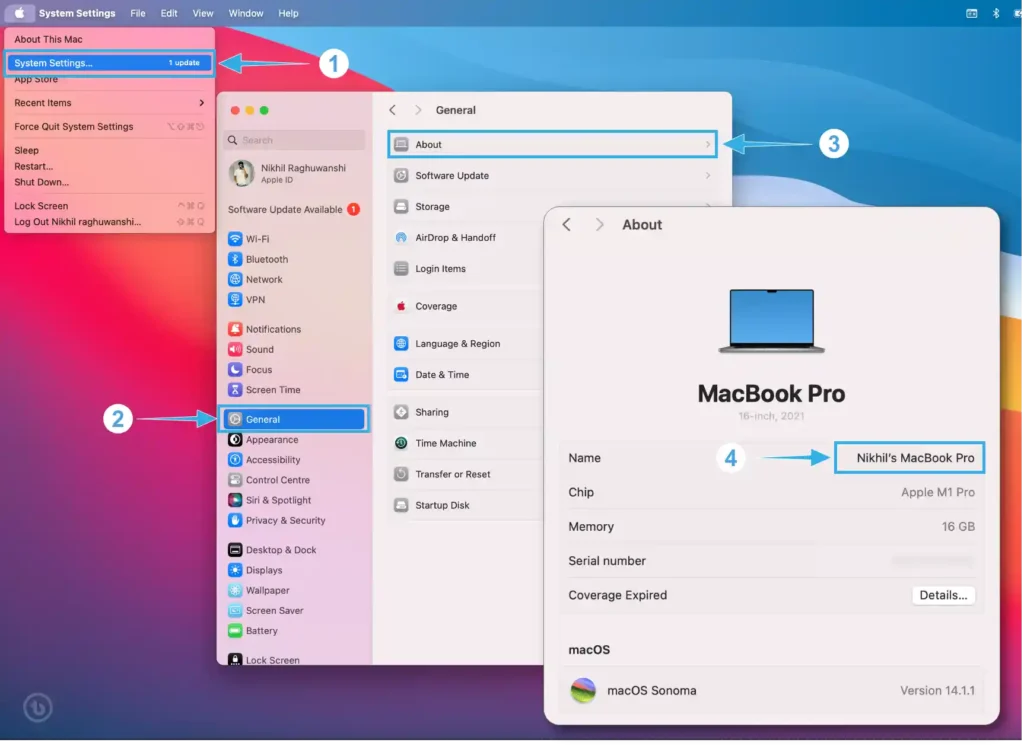
- Click the () Apple logo in the top-left corner of your screen,Then select and click “System Settings“.
- In System Settings, click the “General”.
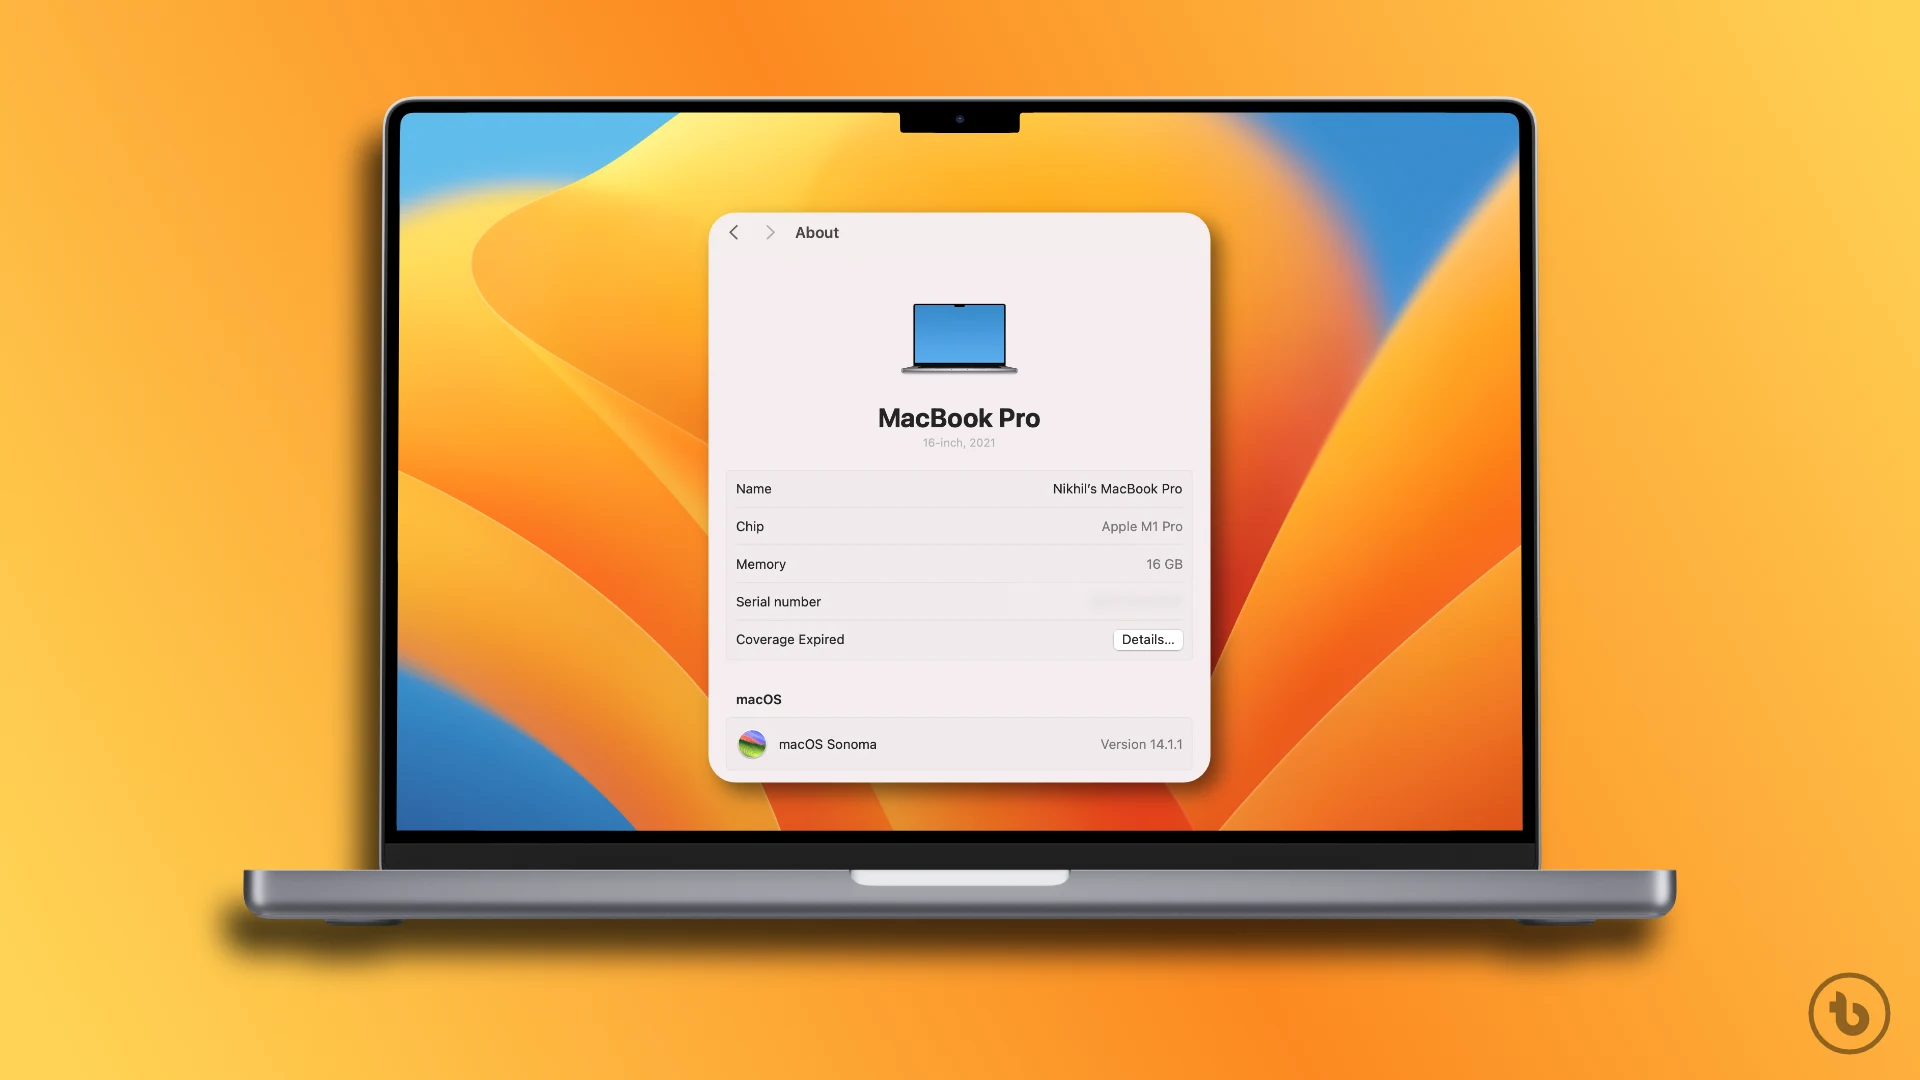
- Then Select “About“.
- Click on the “Name“.
- When you see the cursor, edit the name or type a new one. Once done, hit the Return key on your keyboard to save.
- Click Close to save your changes.
Earlier versions of macOS
Steps:
- Click the () Apple logo in the top-left corner of your screen and choose System Preferences.
- In the System Preferences. Go to the Sharing.
- In the text box at the top of the window, next to the Computer Name, type the new name.
- Quit System Preferences.
After updating your computer name, you can close System Preferences and resume your tasks. If you prefer a straightforward, one-step approach to Change the computer name on your MacBook or any other Mac device, consider the following method.
Tips:
- Your new computer name will take effect immediately.
- You do not need to restart your computer for the new name to take effect.
- Your computer’s name will be used to identify it on a network.
- You can use any name you like, but it is best to use a name that is easy to remember and identify.
Renaming Your Mac Using Terminal
If you’re familiar with the command line, you have the option to utilize the Mac’s Terminal app for configuring or updating your computer’s name in macOS. Follow the instructions below.
Open Terminal:
- Go to Finder > Applications > Utilities > Terminal. (OR) Press the ‘Command + Space key’ on your keyboard, type Terminal, and hit the Return key.
- Once Terminal opens, type the below command and hit the Return key on your keyboard.
sudo scutil –set ComputerName "YourNewComputerName"Note: Replace “YourNewComputerName” with the name you wish to set.
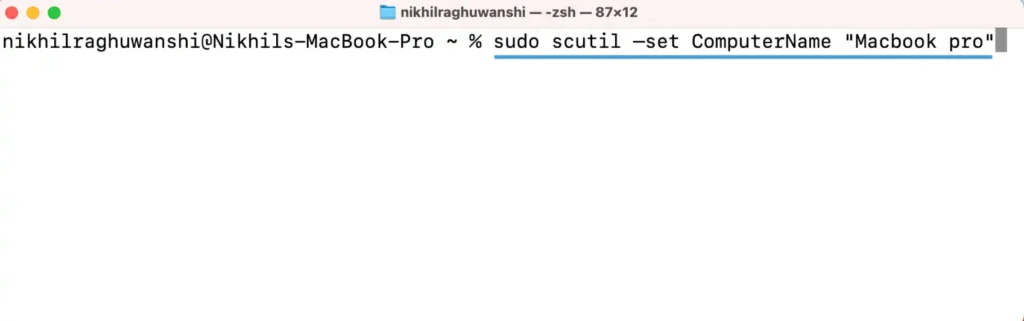
You’ll be asked to enter your Mac’s passcode, and that’s it. Your computer’s name has been successfully updated. Keep reading if you wish to change your Mac’s username.
How to Change the Name of a User on Mac
Ready to shed your old username and embrace a new digital identity? Renaming your user account on a Mac is easier than ever, especially with the latest macOS Ventura update. No more “Guest” or childhood nicknames haunting your login screen! We’ll guide you through the process, so buckle up and let’s venture into Ventura-land (or your preferred pre-Ventura macOS).
macOS Ventura or later
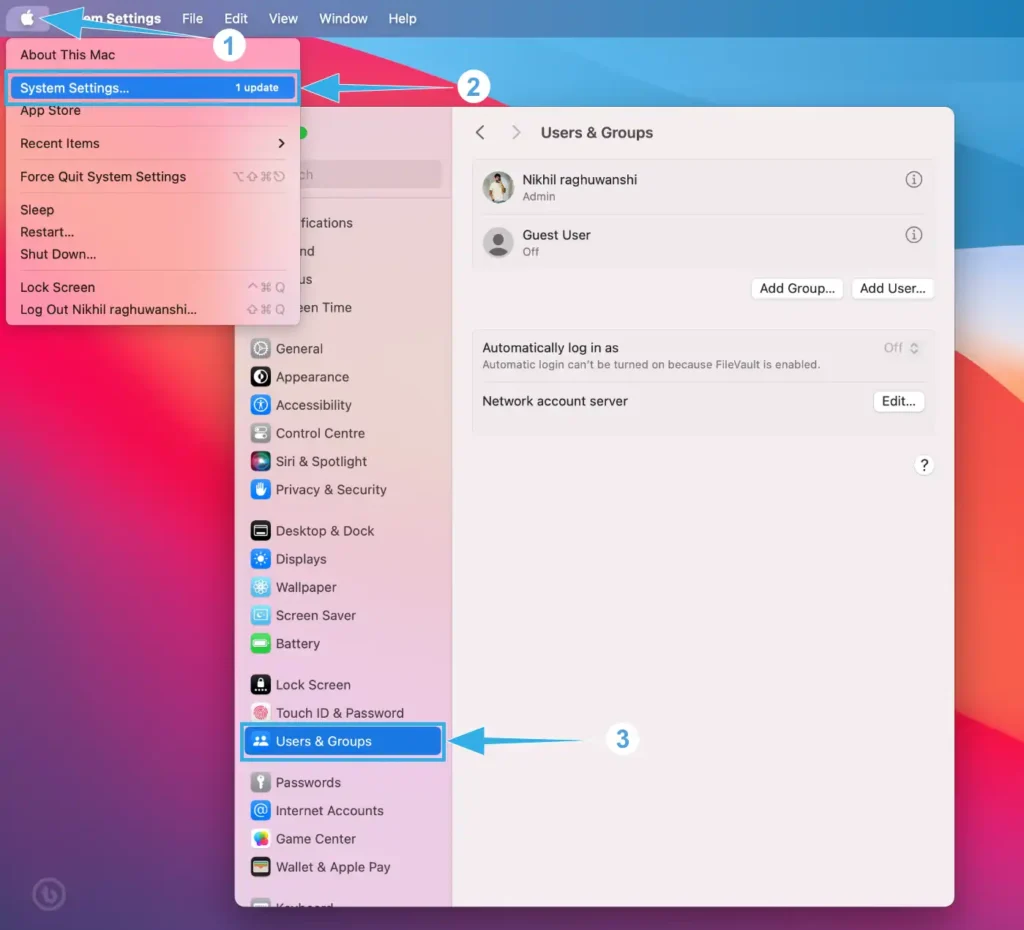
1. Click the () Apple logo in the top-left corner of your screen.
2. Then Select “System Settings“.
3. Click “Users & Groups” in the sidebar.
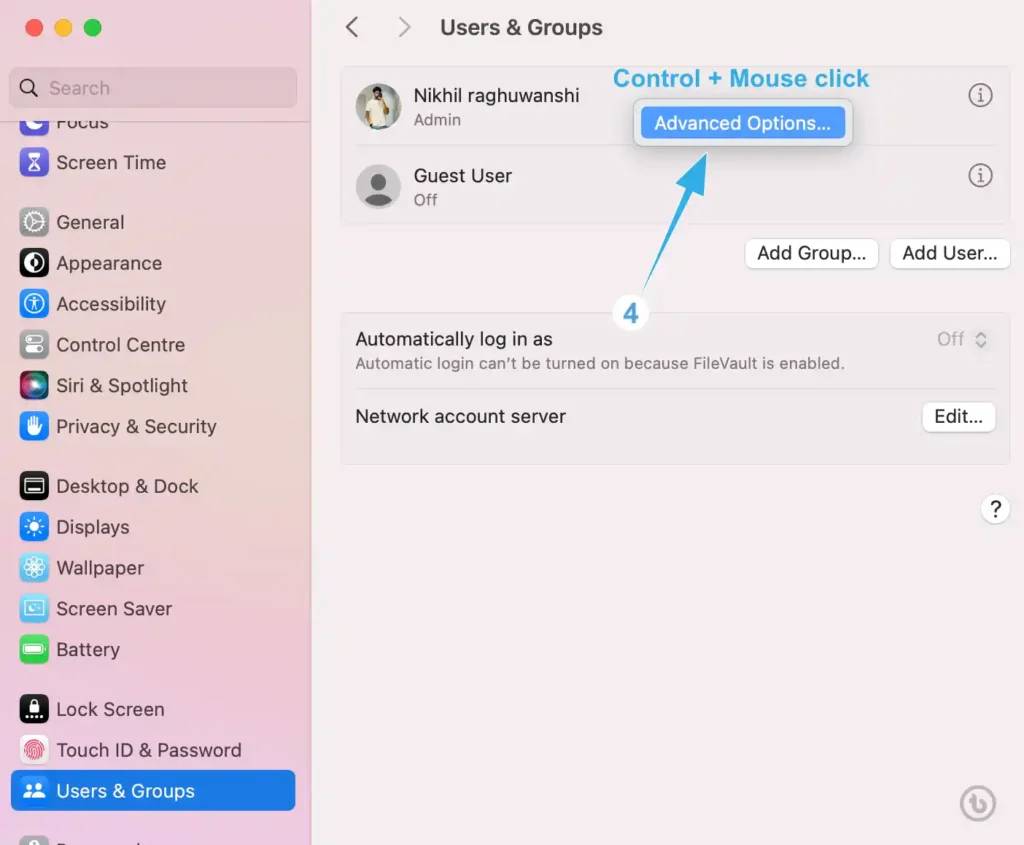
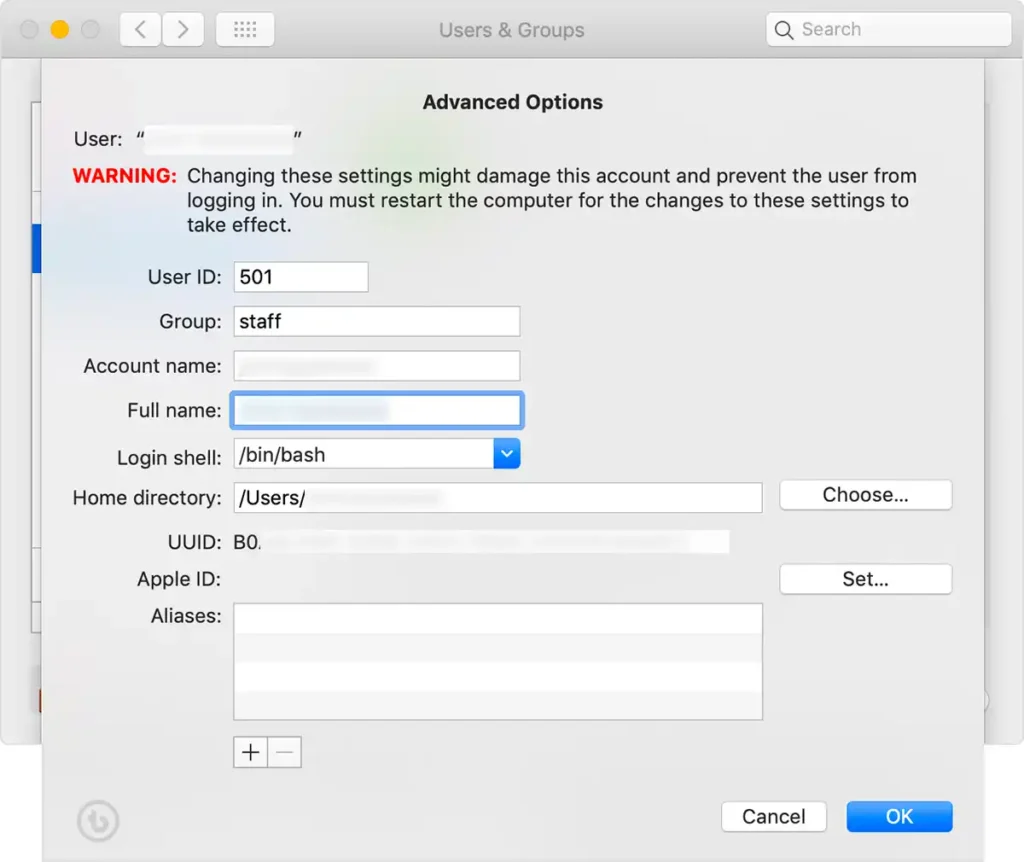
4. Press and hold the Control key on your keyboard, then click the name of the account that you’re renaming. Choose Advanced Options from the menu that appears.
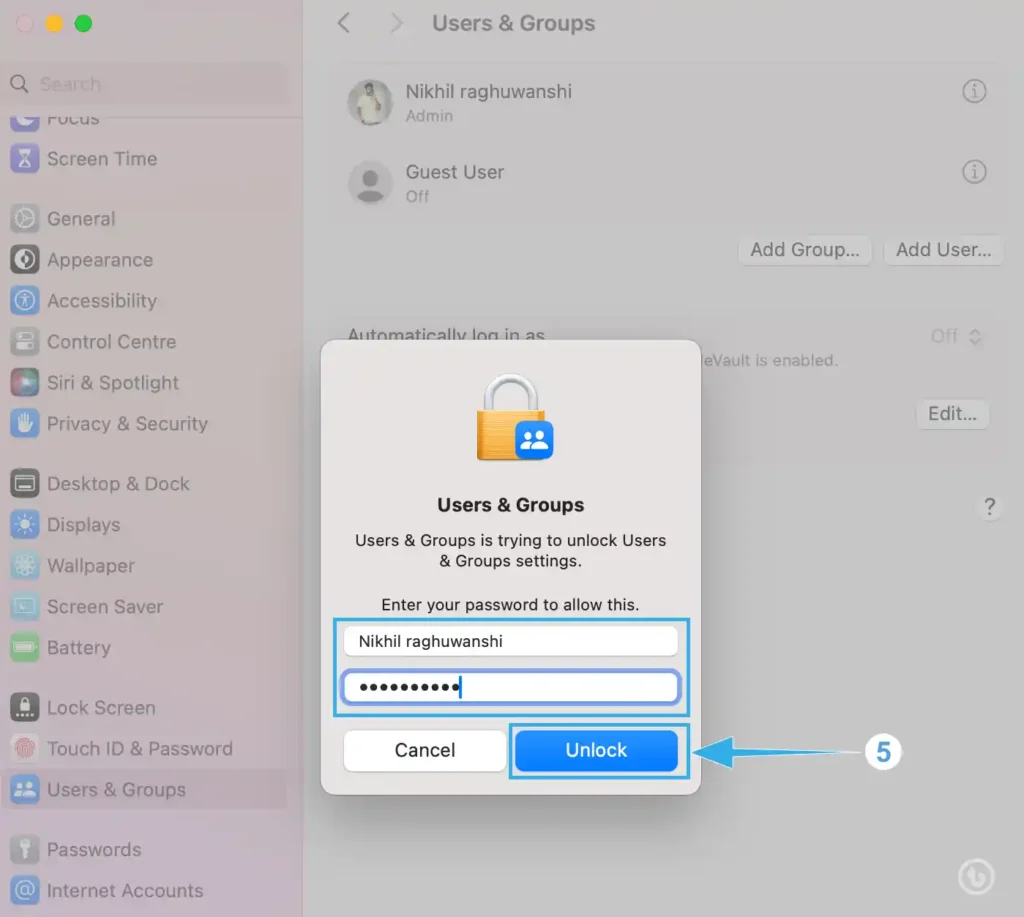
5. When prompted, enter the administrator name and password you’ve just used to log in and click the Unlock button.
6. In the modal, click on the text box next to Full Name and enter or change the new name.
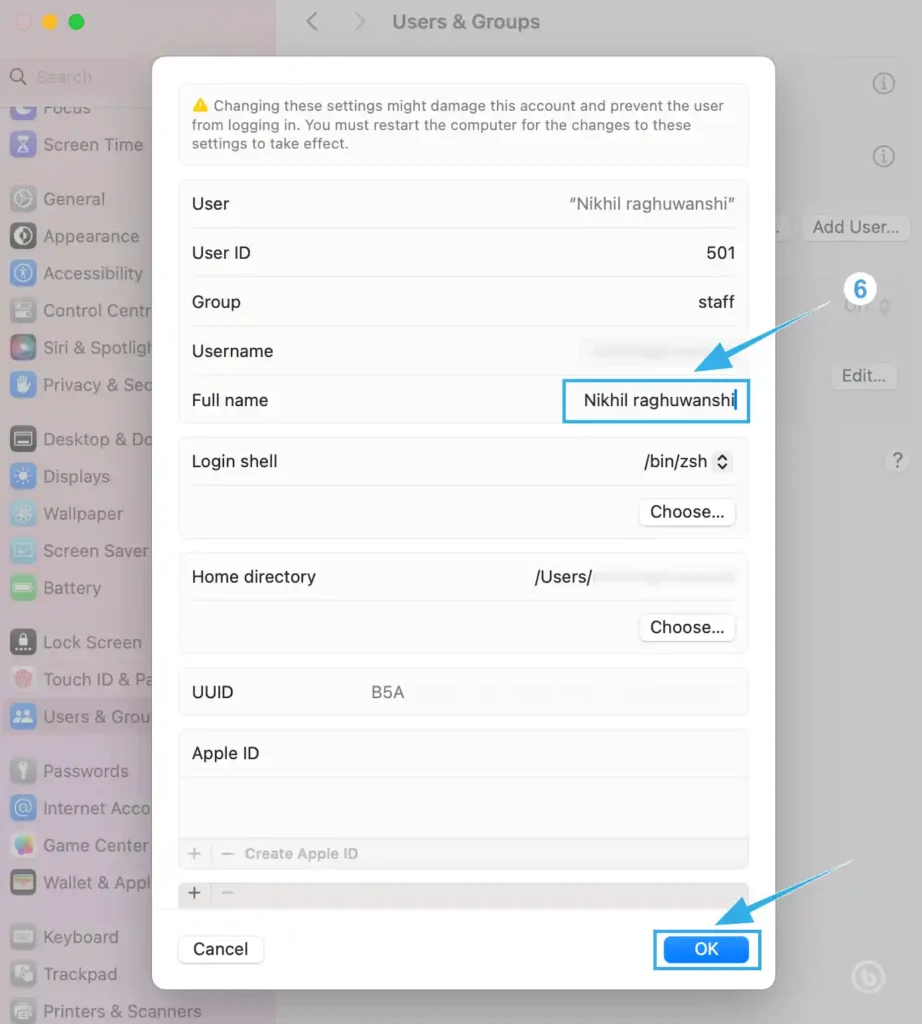
There you go. The user’s name you changed will be reflected throughout the Mac.
On macOS Monterey or Earlier
- Choose Apple menu > “System Preferences“.
- Within the System Preferences window, navigate to “Users & Groups“.
- Unlock system settings by clicking on the padlock at the bottom; provide the admin password when prompted. In this section, you’ll find a list of users with accounts on the macOS device.
- Right-click on the user whose name requires modification and select Advanced Options.
- Click on the text box next to Full Name, input or edit the new name, and click OK.
Congratulations! You’ve successfully updated the name of the specified user on your Mac. Explore the following method if you wish to change your Mac’s hostname.
How to change the hostname of your Mac
Modifying the hostname of your Mac alters its identification on a local network, distinguishing it from the computer name. It’s important to note that the computer name and hostname can be distinct. Below are the instructions for Macs operating on macOS Ventura and newer versions.
macOS Ventura or later
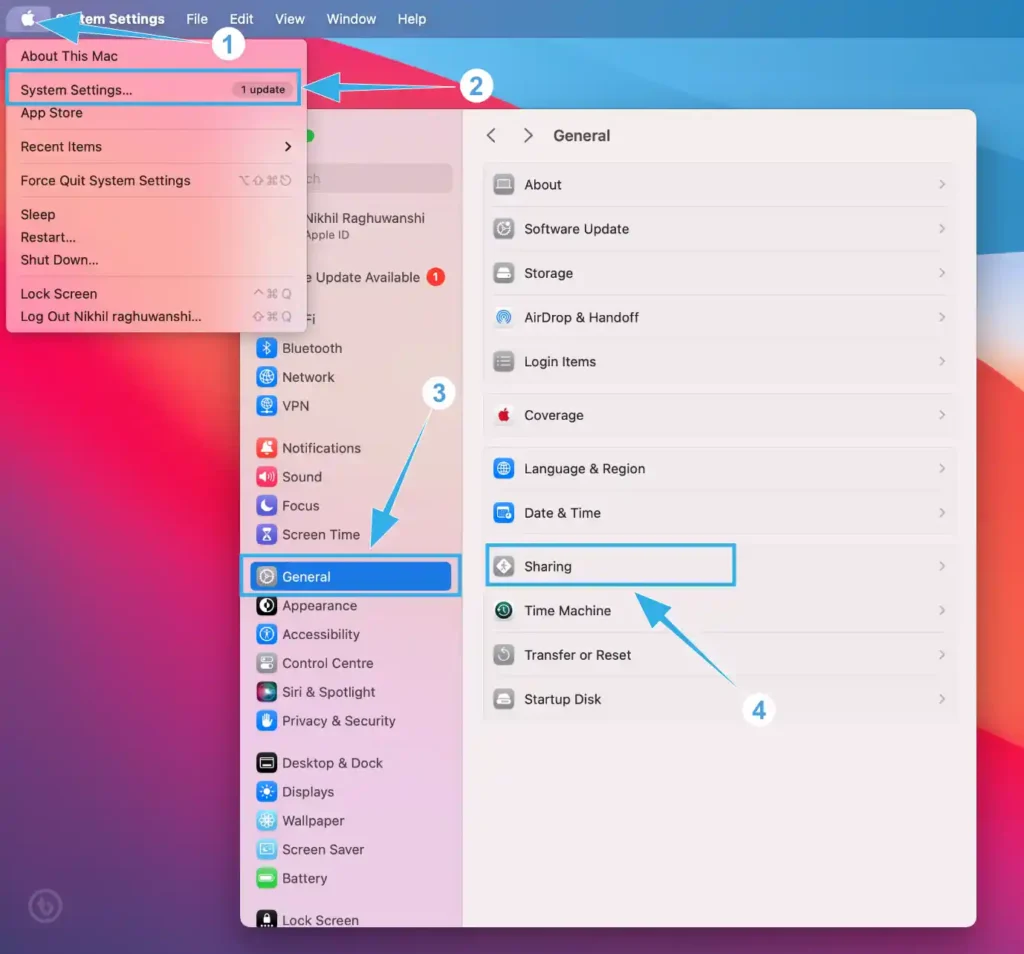
1. Click the () Apple logo in the top-left corner of your screen.
2. Then Select “System Settings“.
3. Click “General” in the sidebar.
4. Under General, choose “Sharing“.
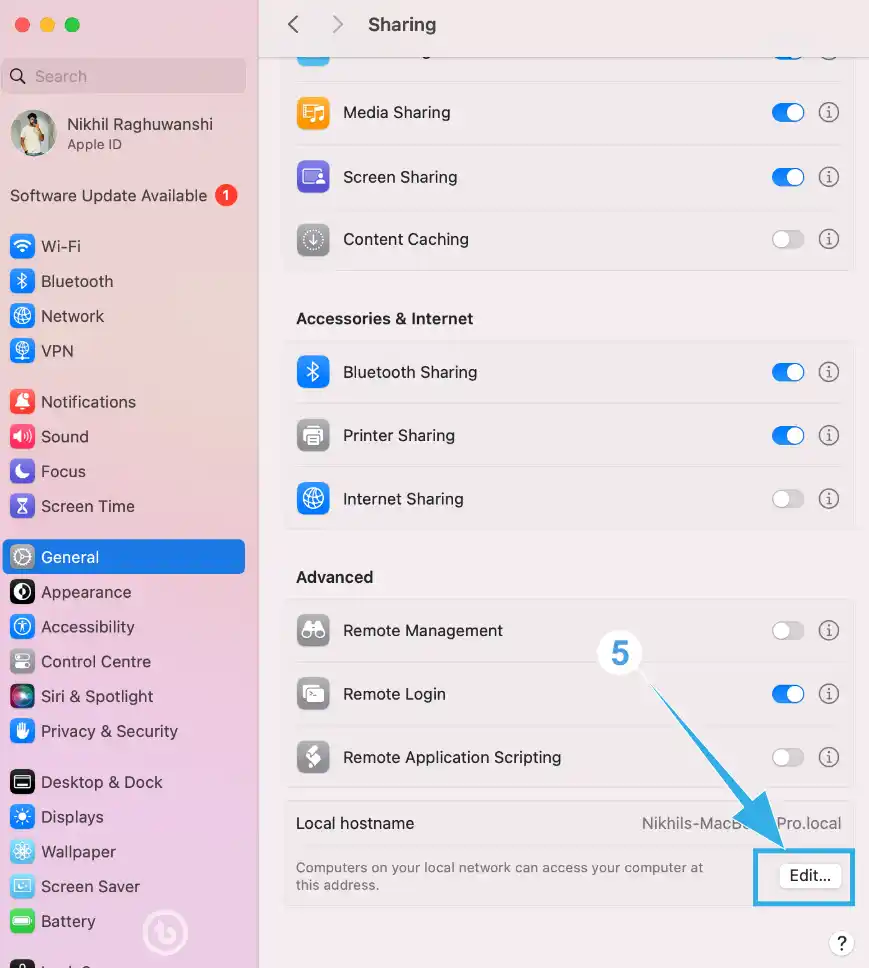
5. Scroll down to Local hostname and click on Edit.
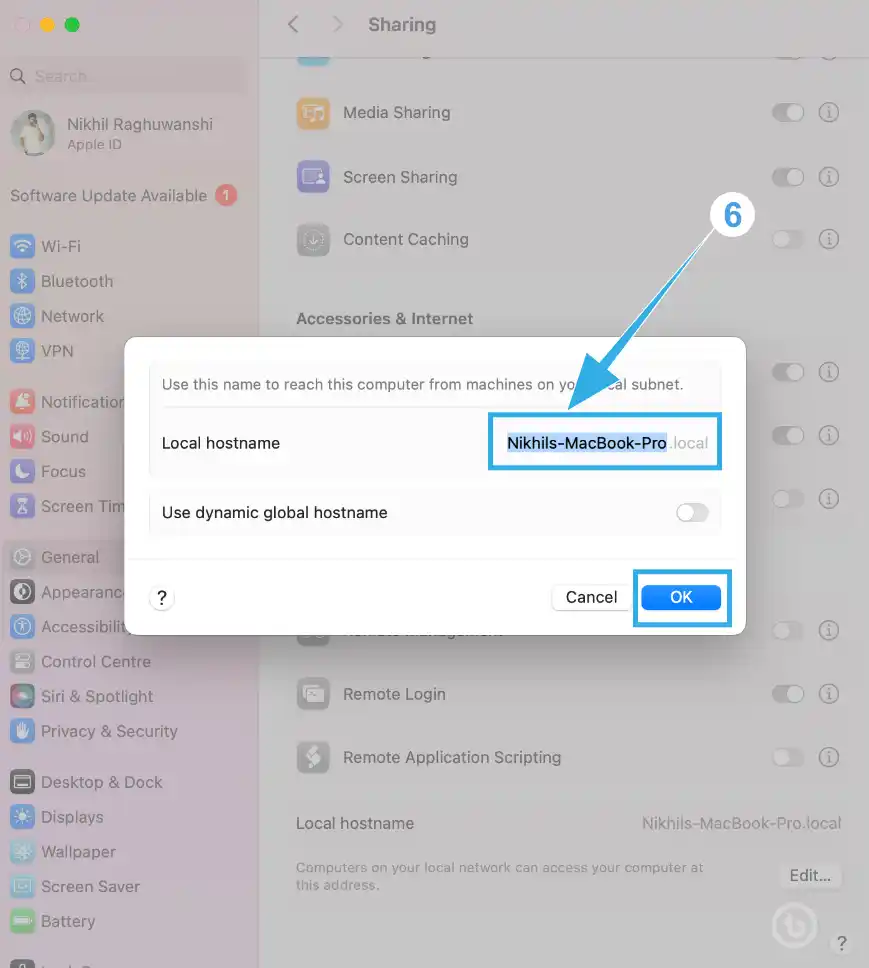
6. In the pop-up, type the new hostname or edit the existing one and click OK.
That’s it. You have successfully changed the hostname of your Mac.
On macOS Monterey or Earlier
1. Click the () Apple logo in the top-left corner of your screen, and from the drop-down menu, select “System Preferences“.
2. Choose “Sharing“.
3. In the modal, click “Edit”.
4. Type your new hostname or edit the existing one and click OK to save.
Conclusion:
Changing your MacBook’s name is a quick and simple way to add a personal touch to your device. Whether you’re aiming for a creative flair or improving organization, following these easy steps will have your MacBook sporting a new name in no time. Embrace the opportunity to make your MacBook uniquely yours with a name that suits your style and preferences. I hope you like this article on How to Change MacBook Name With Easy Steps.
Read More – Mac