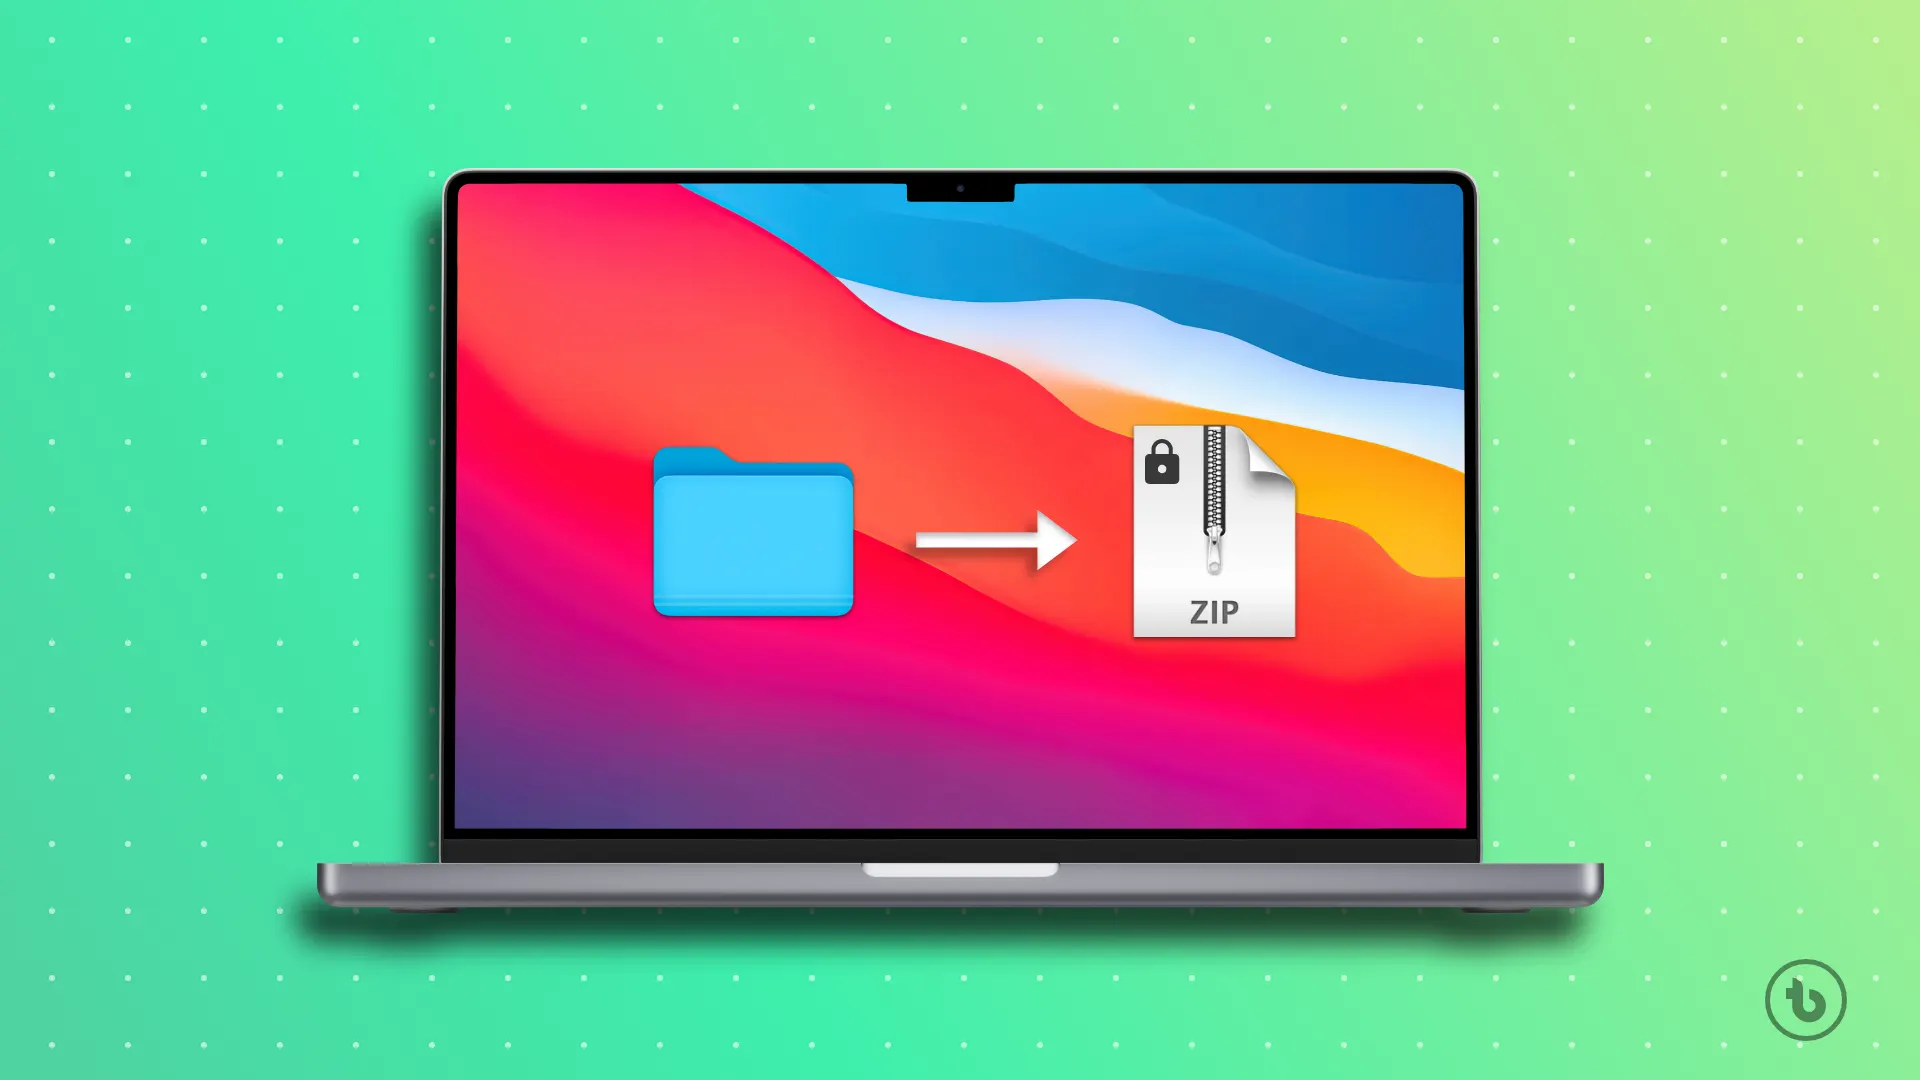
Learn the easy steps to Create Password Protected Zip Files in Mac. Keep your data secure with our comprehensive guide on password protecting Zip archives in macOS.
In the digital age, the need to protect sensitive or confidential files is more critical than ever. One effective way to secure your files is by creating password-protected ZIP archives. On macOS, you can easily create these encrypted ZIP files to keep your data safe from prying eyes. In this guide, we’ll walk you through the step-by-step process of creating and password-protecting a ZIP file on macOS.
How to Create Password Protected Zip Files in Mac
Step 1: Prepare Your Files
Before you begin, gather all the files and folders you want to include in your ZIP archive. Organize them into a single folder if necessary.
Step 2: Open Terminal
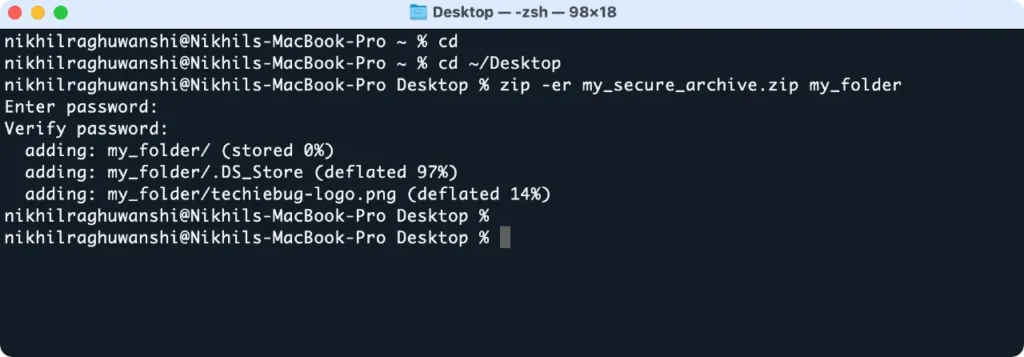
To create a password protected ZIP file on macOS, you’ll need to use the Terminal. You can find Terminal in the “Utilities” folder within the “Applications” folder or simply search for it using Spotlight.
Step 3: Navigate to Your Files
In Terminal, navigate to the directory where your files are located using the cd command. For instance, if your files are in the “Documents” folder, you would type:
cd ~/DesktopThis command moves you to the “Desktop” directory. Replace “Desktop” with the name of your folder if it’s located elsewhere.
Step 4: Create the Password-Protected ZIP File
To create the ZIP archive with password protection, use the zip command followed by the -er flag (for encryption), the desired name of the ZIP file, and the name of the folder or files you want to compress. For example:
zip -er my_secure_archive.zip my_folderIn this example, “my_secure_archive.zip” is the name you want to give to your password-protected ZIP file, and “my_folder” is the name of the folder you want to compress. You’ll be prompted to enter a password; make sure to choose a strong one and remember it.
Step 5: Password-Protect the ZIP File
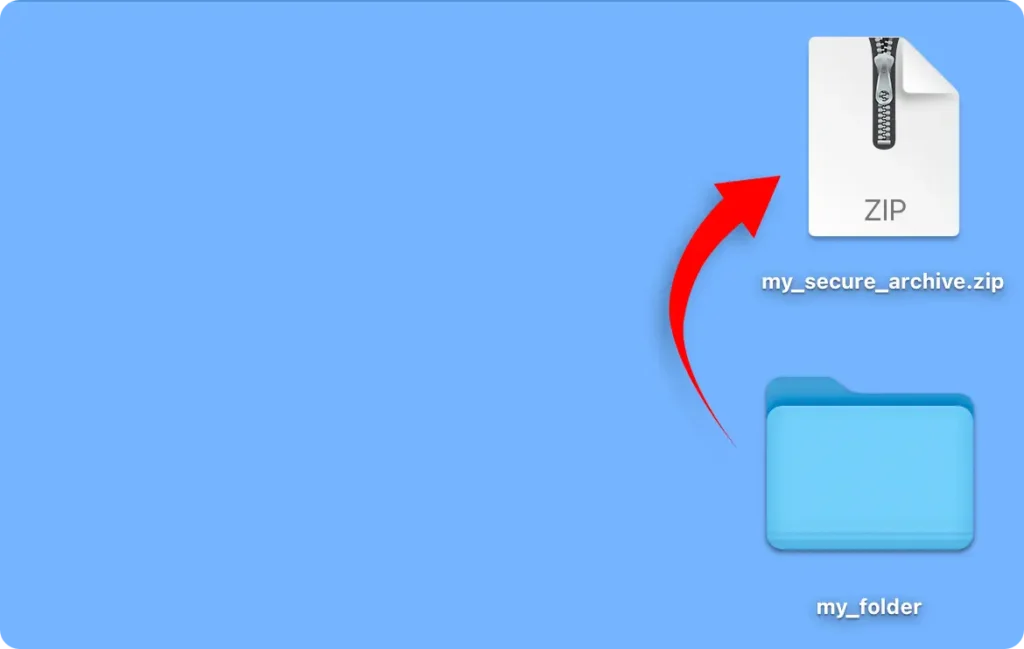
After entering and verifying your password, Terminal will create a ZIP file in the current directory. This ZIP file is now password protected and contains the contents of the specified folder or files.
Now you can delete the original file.
Step 6: Securely Store the Password
Since the password is the key to unlocking your ZIP file, it’s crucial to store it in a safe place. If you forget the password, you won’t be able to access the ZIP file. Consider using a password manager to securely store this information.
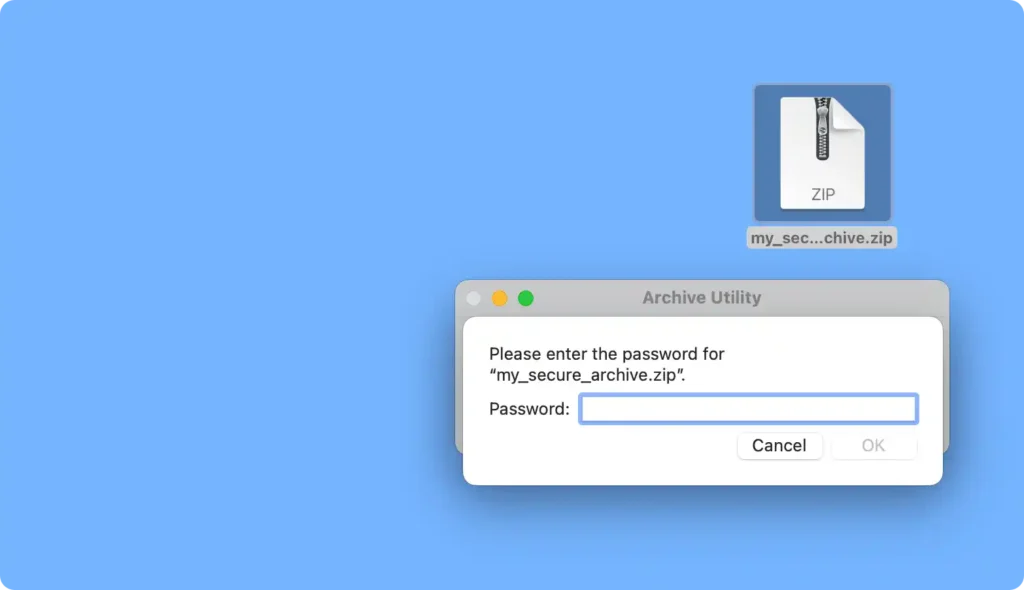
Step 7: Accessing the Password-Protected ZIP File
To open the password protected ZIP file, simply double-click it. macOS will prompt you to enter the password you set. After entering the correct password, you’ll have access to the contents of the ZIP archive.
Conclusion
Creating and password-protecting ZIP files on macOS is a straightforward and effective method to enhance your data security. Whether you’re transmitting sensitive data or preserving crucial documents, this technique ensures the confidentiality and integrity of your files. Don’t forget to choose a robust password and store it in a secure location to guarantee the continued security of your files. Armed with these steps, you can confidently create a password protected ZIP files on your Mac.
Read More – Mac